I got a Raspberry Pi Zero W as a Christmas gift and I have spent yesterday and today getting it set up, which for the most part means installing the operating system.
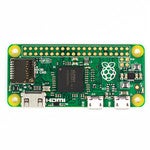
First off, now that I have one in hand, I am really surprised by the size of the Pi Zero, it is 2.5 inches long by 1.25 inches tall. For some reason I thought the Pi Zero was larger.
The kit that I received comes with everything you need to get going. It includes the Pi Zero W board, a case with three different tops, a mini HDMI to full HDMI dongle, a micro USB to USB A dongle, a micro SD card, and power supply.
The micro SD card is the primary storage device for the Raspberry Pi and one of the first things that you need to do is configure it with an operating system. The card is pre-configured for a New Out Of Box (NOOB) experience, meaning that it comes configured to guide you through installing a variety of different operating systems.
Raspbian is a customized distribution of Debian tailored for the Raspberry Pi, and is what is recommended for new users. There are other OS images configured to set up a Raspberry Pi as a media server, for example, while Raspbian is configured to function like a standard Linux desktop.
I am not really a new user, I first bought a Raspberry Pi 2 a couple of years ago, and therefore I knew that the version of Raspbian that came with the Pi Zero is based on Debian “Jessie” that is not the most current version, that is based on Debian “Stretch” and available for download from raspberrypi.org.
It has taken me several attempts but I have finally got Debian “Stretch” installed and current on my Pi Zero.
First, I did the default install, but when so fast through the menus that I failed to configure the Pi Zero to connect to my WiFi network, consequently the installed failed in its attempts to obtain the latest version of files resulting in being half complete.
The good thing about Raspberry Pi is that it is intended for experimentation and failures, which leads to learning, and the Raspberry Pi was developed first and foremost as a learning tool. To start over all I need to do is press the Shift key while starting up to put the Pi in Recovery mode from which I can start the install process over.
This time, I paid more attention and configured NOOB to connect to my WiFi network, and that resulted in seeing more options, including one for installing Debian Stretch, which was labeled as Recommended, and so that is what I selected.
Alas, the computer gods were not being cooperative and while downloading the install files my home network lost connection to the Internet. After fixing the Internet connection I attempted to restart the installation, but ended up in the end with kernel panics and other errors that lead me to believe I had another bad installation. Strike 2.
Next, I thought I would revert back to the Jessie version of Raspbian that is on the SD card and then do a dist-upgrade. I seemed to make more progress, succeeding in getting Jessie installed but then the attempt to do the dist-upgrade was taking too long and I grew impatient and cancelled it.
At this point I decided to download the version of Raspbian Stretch to my MacBook and flash it on to the storage card using Etcher.io. I noted earlier that the kit that I got came with a case, and I installed the Pi Zero into that case that has cutouts for the HDMI, USB, and power ports, but oddly it does not have a cutout for the SD card. To remove the SD card you have to remove the Pi Zero from the case, which at least is easy to do by gently pushing the board up from the bottom via an exposed slot.
The recommendation I would make to others is to get the Pi Zero all configured before installing it in the case, just to make life a little easier if you end up having to remove the SD card several times.
After downloading the OS image, flashing it with Etcher, inserting it in the Pi Zero and booting it up, I ended up at the Pixel desktop in which I could then customize how I want the Pi Zero to boot. In my case I changed the default password, configured it for access via SSH, and set it to boot to the command line rather than the full desktop.
After rebooting so that the SSH settings could take affect, I was ready for the final pass at upgrading (apt-get upgrade) which I did, but ended up with another kernel panic when it attempted to upgrade openssh. Another reboot later, I did another apt-get upgrade and was instructed to run dpkg –configure -a to finish the upgrade that was interrupted and finally ended up with a complete install.
For the moment I am not sure exactly how I will be using the Pi Zero, but there are many projects available on the Internet. I have a Pi 2 and Pi 3 running nearly full time in my home office.
My Pi 2, which is mounted to a seven inch display, is serving as a desk clock that displays my diary for the next three days, the local weather and four day forecast, and CNN newsfeed over pictures that rotate every couple of minutes. The display power cord is connected to a smart plug controlled by a motion sensor that turns it and a light off when there is no movement near my desk for ten minutes.
The Pi 3 is running an in-house instance of River5, which I use to follow my RSS subscriptions. I also use it to test a variety of Nodejs apps, and I have even experimented with running Mac OS 7 in emulation.